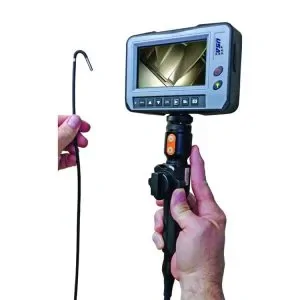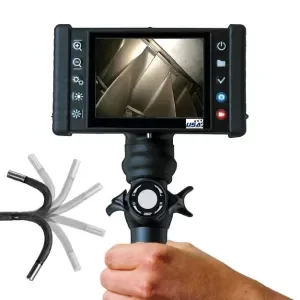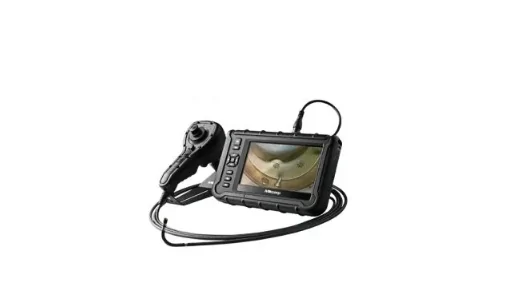
A measuring borescope is one of those tools that sounds straightforward until you’re using one in the real world. In theory, it measures defects inside tight spaces. In practice, the question becomes: What kinds of measurements can it truly do reliably, and what should you avoid assuming it can do?
That’s an important distinction. A measuring borescope isn’t a coordinate measuring machine (CMM), and it’s not meant to replace precision metrology on the bench. But for remote visual inspection (RVI) in places you can’t reach with traditional tools, inside engines, piping, castings, turbines, heat exchangers, and more, it can quantify a wide range of features and help you document them in a way that’s much easier to compare over time. For teams building or improving an inspection workflow, USA Borescopes supports measurement-capable borescope solutions that fit different environments and inspection needs.
The Big Idea: Turning Images Into Real-World Dimensions
At its core, a measuring borescope uses calibrated optics and software to convert what the camera sees into real-world dimensions. The inspector captures a stable view of a feature and uses measurement tools (often cursor-based) to select points, edges, or regions. The system then calculates dimensions based on its measurement method (for example, stereo or 3D measurement approaches).
This is why two ideas show up constantly in measuring borescope work:
- Measurement depends on technique. Camera angle, stability, lighting, and distance all influence outcomes.
- Measurement is best within a specific range. Most systems have an effective measuring range where accuracy and repeatability are strongest.
If you treat a measuring borescope as a simple “click-and-measure-anywhere” tool, results can be disappointing. If you treat it like an inspection instrument that rewards a consistent method, it becomes a powerful way to quantify internal conditions without teardown.
The Core Measurement Types
Different manufacturers use different names, but most measuring borescopes provide a set of measurement modes that cover the most common inspection needs. Here are the main types technicians rely on, and what they’re actually good for.
Length measurements (point-to-point and edge-to-edge)
What it measures: The distance between two selected points on a surface.
Typical use cases:
- Crack length (where the crack edges are clearly visible)
- Nick width or length on blades/vanes
- Scratch length on a bore wall or component surface
- Distance between features for reference documentation
Why it matters: Length measurement is often the most frequently used tool because it’s intuitive, quick, and useful for many defect types. The key is selecting repeatable points; clear edges, endpoints, or consistent reference marks.
Depth and step height measurements
What it measures: The depth of a pit, depression, or step relative to surrounding material (within the capability of the system).
Typical use cases:
- Pit depth in corrosion or pitting damage
- Surface loss on components
- Step height differences where surface transitions occur
Why it matters: Depth is often the difference between monitor and repair. But it also tends to be more sensitive to distance and angle than basic length measurement. Stable positioning and staying within the system’s effective measuring range are critical.
Area measurements
What it measures: The size of a region outlined by the operator (a patch, zone, or defect area).
Typical use cases:
- Corrosion patches
- Coating loss zones
- Erosion regions
- Heat distress zones on components
Why it matters: Area is useful when damage isn’t a single feature but a broader region. It supports documentation and helps track whether an affected area is expanding over time.
Point-to-line and point-to-surface measurements
What it measures: The distance from a point to a defined line or reference surface (depending on the tool and system).
Typical use cases:
- Characterizing a feature relative to an edge
- Measuring how far an indication is from a reference boundary
- Supporting repeatable location-based documentation
Why it matters: These tools are often used to improve repeatability in documentation. Instead of only recording defect size, you can record defect location relative to a known feature.
Profile and surface geometry measurements
What it measures: A representation of how the surface changes along a line or across a region (often associated with 3D measurement capabilities).
Typical use cases:
- Characterizing contour changes
- Understanding wear patterns across a surface
- Evaluating geometry changes on curved or complex components
Why it matters: Surface geometry tools can add context that’s hard to capture with a single point-to-point measurement, especially on curved surfaces where perspective can distort appearance.
What Technicians Commonly Measure in the Real World

Specs and measurement modes are one thing. What does this look like during day-to-day inspections?
Measuring borescopes are commonly used to quantify:
- Cracks and crack-like indications
Measuring length helps with documentation and trending. (It’s still important to pair measurements with appropriate engineering evaluation and acceptance criteria.) - Pitting and corrosion
Measure pit size and, where supported, depth. Measure the affected area of corrosion patches. - Nicks, dents, and impact damage
Especially in engines or rotating equipment, measurements help determine severity and document condition. - Erosion and wear patterns
Measure the extent of an eroded zone or track changes in a high-wear region over time. - Surface distress and coating issues
Measuring area and documenting location helps track progression and supports consistent reporting.
These use cases vary by equipment type and industry. For a clearer sense of where measurement capabilities show up across inspection environments, engines, piping, manufacturing, and more, the examples on the USA Borescopes applications page help connect measurement modes to practical inspection scenarios.
What Impacts Accuracy (and How to Reduce Error)
A measuring borescope can be extremely useful, but only if the measurement is taken under conditions the system can handle. Here are the most common factors that influence measurement reliability.
Distance: staying in the sweet spot
Most measuring systems perform best within a defined distance range. If the scope is too close, distortion or focus issues can occur. Too far and edges become harder to define, and small defects become less measurable. When you’re near the limits of the range, measurements can vary more between captures.
Best practice: Take measurements from within the recommended measuring range and capture multiple measurements if the finding is critical.
Angle: minimize perspective distortion
Measurements are easier when the camera is as close as possible to perpendicular to the surface. If the probe is angled sharply, edges can appear stretched, compressed, or partially hidden, making it hard to place cursors consistently.
Best practice: Use articulation to square up the view and stabilize the probe before freezing the frame.
Lighting and surface reflectivity
Glare can wash out defect boundaries and make accurate cursor placement difficult. Reflective surfaces, common in engines and machined parts, can be challenging. Shadows and uneven lighting can also hide edges or make a feature look deeper than it is.
Best practice: Adjust illumination, change angle slightly, and avoid overexposure. Clean optics make a bigger difference than many teams expect.
Surface texture and edge definition
Some features are simply hard to define visually. For example, diffuse corrosion boundaries or lightly textured surfaces may not have crisp edges. Measurement tools work best when endpoints and boundaries are clearly identifiable.
Best practice: If the edge isn’t clear, document the feature visually and consider taking measurements from multiple viewpoints or using a different measurement mode that fits the feature.
Operator technique and repeatability
Even with the same scope, different technicians can get different results if their technique differs. Consistent measurement is a skill, not just a feature.
Best practice: Standardize capture habits (distance, angle, lighting) and use consistent reference points when trending over time.
Quick Tips for More Repeatable Measurements

If you want measurement results you can trust and compare, a few habits go a long way:
- Stabilize before measuring. Don’t measure while the image is drifting.
- Take multiple captures for critical findings. Compare results and keep the best documented evidence.
- Record the context. Component section, orientation, stage/blade number, and location details matter for trending.
- Use the same approach over time. Similar angle and distance improve comparability.
For organizations that need help building a consistent inspection workflow or want support options like rentals, repairs, or equipment assistance, reviewing the support offerings on the USA Borescopes services page can help connect the tool to the long-term program.
So what can a measuring borescope actually measure? Quite a lot; when used correctly. From length and depth to area and surface geometry, measuring borescopes help technicians quantify internal defects in places traditional tools can’t reach, creating inspection records that are easier to defend, share, and trend over time.
For teams evaluating measurement-capable inspection solutions, USA Borescopes is positioned as a third-party resource for selecting the right equipment and supporting it long-term. If you want to compare options by use case, you can start with products and explore inspection environments through industries. When you’re ready to talk through your specific measurement needs, the next step is to contact them today.
About The Author
The author is an inspection and maintenance expert who specializes in measurement-based remote visual inspection. With experience across multiple industries, they focus on helping technicians understand what measuring borescopes can reliably quantify, and how technique, conditions, and workflow impact real-world results.
